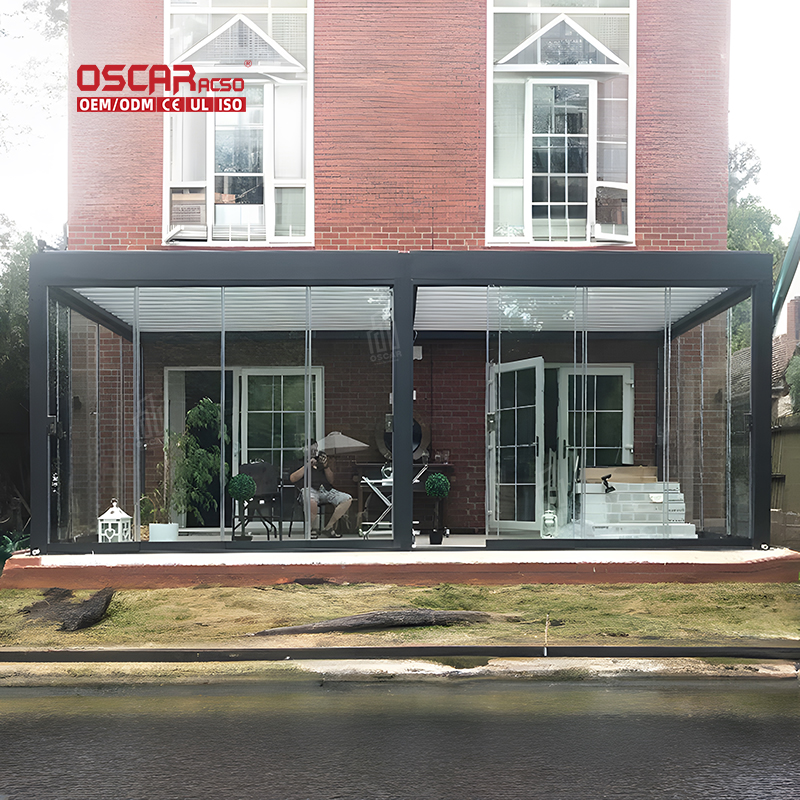
Build a 6×3 Bioclimatic Pergola, Transform Your Outdoor Living Space
Imagine effortlessly controlling the sunlight and ventilation in your outdoor space with a structure you built yourself....
Imagine effortlessly controlling the sunlight and ventilation in your outdoor space with a structure you built yourself. A 6×3 bioclimatic pergola offers precisely that—an intelligent, customizable solution for modern outdoor living. By embarking on a DIY project, you gain not just a functional shade provider but a deeply personal retreat tailored to your taste and needs. Let’s explore how to bring this transformative structure to life.

What is a Bioclimatic Pergola? 🌿
A bioclimatic pergola is an advanced outdoor structure designed to intelligently adapt to weather conditions. Its key feature is adjustable louvers (lamelles), typically made from aluminum, which can be rotated up to 180 degrees. This allows you to:
- •
Control sunlight and shade: Direct or block solar rays throughout the day.
- •
Manage ventilation: Open louvers to catch breezes or close them for protection.
- •
Protect from rain: When closed, the louvers shed water, often to a integrated gutter system.
Unlike fixed-roof pergolas, this design creates a microclimate, enhancing comfort while reducing reliance on artificial cooling or heating. It’s a sustainable choice that harmonizes with your environment.
Why Choose a DIY Approach for Your 6×3 Pergola? 🛠️
Building your own 6×3 bioclimatic pergola is a rewarding venture. Here’s why it’s worth considering:
.jpg)
- •
Cost Efficiency: DIY projects can offer significant savings compared to professional installation or pre-made kits. Material costs can vary, but careful planning keeps budgets manageable.
- •
Customization: You decide everything—the exact dimensions (like a versatile 6×3 footprint), the louver angle, the finish, and integrated add-ons like LED lighting or side screens.

- •
Personal Satisfaction: There’s a unique pride in relaxing in a space you built with your own hands. It’s a functional achievement and a creative outlet.
▶️ Is a DIY bioclimatic pergola difficult to build?
While it requires careful planning and some effort, many enthusiasts with basic DIY skills can successfully complete this project. The key is methodical execution and patience.
Essential Materials and Tools 📋
Gathering the right materials is crucial for a sturdy and lasting structure.
Core Materials:
.jpg)
- •
Posts: Pressure-treated 6×6 lumber or sturdy aluminum posts for vertical supports.
- •
Frame Beams: 2×8 lumber for the main horizontal support frame.
- •
Adjustable Louvers: The heart of the system. Source aluminum louvers designed for bioclimatic use.
- •
Fasteners: Galvanized or stainless steel bolts (e.g., 1/2″ x 4-6 inches), washers, and screws to resist weather.
- •
Foundation Materials: Concrete mix and gravel for securing posts.
Essential Tools:
- •
Tape measure and level
- •
Circular saw or mitre saw
- •
Drill and assorted bits
- •
Socket wrench set
- •
Shovel or post hole digger
- •
Safety gear: gloves and glasses
Step-by-Step Construction Guide 🧱
1. Planning and Design
Start by finalizing your design. Sketch your plan, noting the 6×3 footprint and desired height. Check local building codes for any permits needed for permanent structures. Consider the sun’s path and wind direction to optimally orient the louvers.
2. Site Preparation and Post Installation
Mark the perimeter of your pergola on the ground. For a 6×3 structure, you’ll likely need four or six posts. Dig post holes at least 2 feet deep (check local frost line requirements). Add gravel for drainage, set the posts, use a level to ensure they’re plumb, and secure them with concrete. Allow it to cure fully (24-48 hours).
3. Mounting the Main Beams and Louvers
Once the posts are solid, attach the main horizontal support beams to them. Use heavy-duty bolts for a secure connection. Next, carefully install the adjustable louvers according to the manufacturer’s instructions. This is a critical step—ensure they are aligned correctly and operate smoothly before fully securing them.
4. Final Checks and Finishing Touches
Ensure everything is level, square, and secure. Apply a weather-resistant sealant, paint, or stain to wooden components if desired. This is also the time to add any customizations like:

- •
Integrated LED lighting for evening ambiance.
- •
Automated louver motors for effortless adjustment.
- •
Side screens or curtains for added privacy and wind protection.
Personalizing Your Bioclimatic Oasis 🌸
Your pergola should reflect your style. Consider these ideas:
- •
Green Touch: Train climbing plants like wisteria or clematis on the sides for a natural blend.
- •
Atmospheric Lighting: Hang string lights or install recessed LED strips in the frame.
- •
Comfort Flooring: Define the space with outdoor rugs, decking, or patio stones.
- •
Furnish for Function: Create an outdoor room with comfortable seating, a dining set, or a cozy daybed.
Maintenance for Longevity 🔧
A bioclimatic pergola is relatively low-maintenance, especially with aluminum components. Regularly clean the louvers with mild soapy water to prevent dirt buildup that could affect operation. Inspect and tighten bolts and screws annually. For wooden parts, reapply sealant or stain every couple of years to protect against the elements.
Conclusion: Your Project, Your Paradise
Building a 6×3 bioclimatic pergola yourself is more than a DIY task; it’s crafting a personal retreat that responds to the environment. This project blends sustainability with hands-on creativity, resulting in a space that boosts your home’s value and your quality of life. Embrace the challenge, and soon you’ll enjoy a perfect outdoor haven shaped by your own vision and effort.

