

Pergola lighting is easiest to plan before beams, posts and moving roof components are finalized. If cable paths, control locations and service access are left until installation, the result may require visible conduit, unplanned drilling or awkward maintenance access.
A useful pergola lighting plan separates the decisions a buyer can make from the electrical decisions a qualified local installer must approve. This guide supports project coordination; it does not specify voltage, wiring methods, circuit protection, grounding or permits. Those requirements depend on the selected equipment, the site and local rules.
Editorial boundary: Prepared and reviewed by the Oscar Pergola editorial team using current Oscar product references and published safety guidance. Product availability, electrical design and compliance remain project-specific and must be confirmed before order.
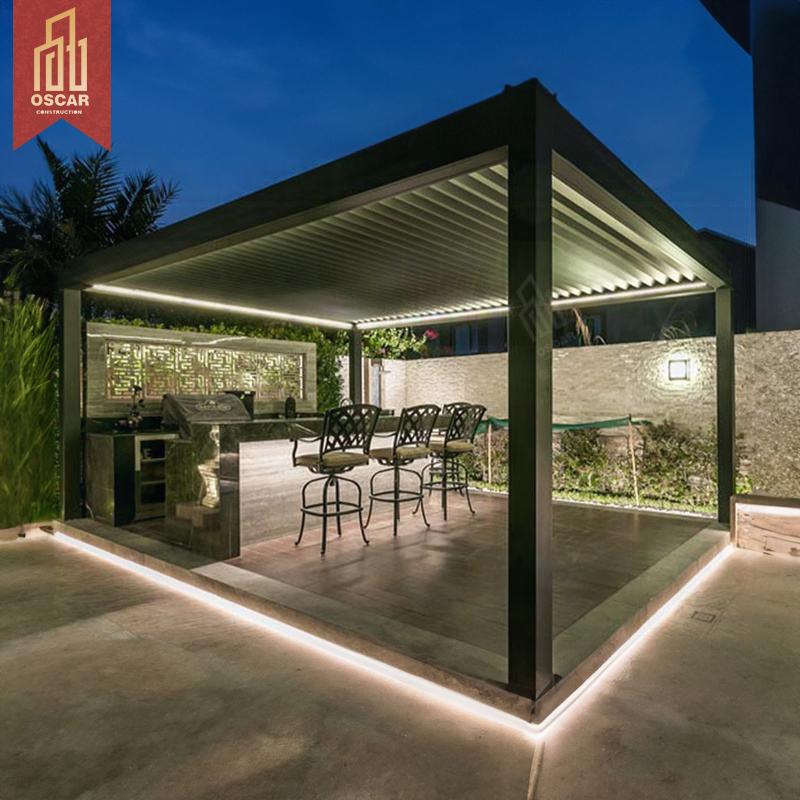
1. Define what the lighting must do
People searching for lights for a pergola often begin with fixture style. A better first step is to name the task for each light. One lighting type rarely handles every use well.
- Circulation lighting: helps people identify steps, edges and routes into or around the pergola.
- Task lighting: supports a dining table, grill, worktop or service counter without putting glare in users’ eyes.
- Ambient lighting: creates a comfortable general level for conversation and evening use.
- Feature lighting: highlights a wall, planting area or part of the structure and can be switched off independently.
Write one purpose beside every proposed zone. If a fixture has no clear job, remove it from the first plan. This reduces clutter and gives the supplier and electrician a clearer brief.
2. Mark lighting zones on the pergola plan
Use a simple plan and elevation, even if the project is still at quotation stage. Label each group L1, L2 and L3, then show the intended switch or control for that group. Also mark doors, dining positions, screens, roof movement, drainage routes and nearby landscape lighting.
- Place task light where the activity happens, not only where a beam looks symmetrical.
- Keep user-facing glare in mind when lights are viewed from seating, glazing or neighboring property.
- Separate functional and decorative zones so they do not have to operate together.
- Check that open louvers, screens and other moving parts will not block light or contact a fixture or cable.
3. Verify outdoor suitability for the exact location
Do not rely on the word “outdoor” alone. A protected beam, an exposed perimeter and a low-level light near irrigation can face different moisture conditions. The UL luminaires marking guide distinguishes damp locations from wet locations and says luminaires should carry a location marking appropriate to where they are installed.
Ask for the fixture, driver and connector datasheets—not only a photograph or a generic waterproof claim. The qualified installer should confirm that every component, enclosure, connection method and mounting orientation is suitable for the actual exposure and local market.
4. Reserve cable routes without compromising the structure
Cable routing is an interface between the pergola supplier and the electrical installer. The supplier should identify usable cavities, entry and exit points, removable covers and areas that must not be drilled. The installer should select the compliant cable and connection method.
Before production, check that the proposed route avoids moving louvers, motors, fasteners and drainage paths. Confirm how the cable passes between the building and an attached pergola, or from the ground supply into a freestanding post. Never assume a hollow profile can be drilled anywhere; obtain an approved location from the structure supplier.
5. Keep drivers and controls serviceable
Drivers, transformers, receivers and junction points need locations that match their product instructions and remain accessible after assembly. A hidden component that cannot be reached without dismantling the roof turns a routine replacement into structural work.
- Identify who supplies each driver, controller and enclosure.
- Confirm whether access is from below, above or through a removable cover.
- Check compatibility among the luminaire, driver, dimmer and control protocol.
- Record any manufacturer limits that affect cable length, placement or operating conditions.
6. Specify control behavior, not just “a switch”
Decide how each zone should behave before ordering: on/off, dimming, scene control, timer or sensor. If a smart system is requested, also define a practical manual control and what should happen after a power interruption. Dimming is not automatic; the light source, driver and control must be compatible.
Where the pergola also has a motor, screens or sensors, list lighting separately from movement controls. This prevents a vague “remote control included” note from hiding which functions are actually covered.
7. Give site-specific electrical decisions to the qualified installer
The electrician or other qualified professional for the project location should confirm the available supply, circuit loading, protective devices, grounding or bonding, disconnecting means, cable system, permits, testing and any special requirements near pools or other wet areas. The Electrical Safety Foundation International also advises using outdoor-rated products and involving an electrician for location-specific outdoor electrical safety.
The pergola quotation should not replace this electrical review. Instead, it should provide the structure and component information that lets the installer complete it correctly.
8. Design for useful light, not maximum brightness
Compare light output, beam distribution, shielding, color appearance and controls rather than selecting by wattage alone. The U.S. Department of Energy’s outdoor lighting guidance recommends directing light only where it is needed, using no more than needed, adding controls and choosing color thoughtfully.
For a pergola, that means checking the night view from both inside and outside the structure. A marked-up rendering or sample installation can help the project team judge glare and dark areas, but the final layout should rely on the selected fixture’s verified photometric information when lighting performance is important.
9. Build one interface schedule for the quotation
Before approving the order, combine the lighting decisions into one short schedule:
- Plan and elevation with every lighting zone labelled.
- Fixture, driver, connector and control datasheets.
- Approved cable entries, routes, covers and no-drill areas.
- Responsibility list showing what the pergola supplier, electrician and site contractor each provide.
- Service-access method and replacement path for every concealed component.
- Installer review, test and commissioning requirements.
A quotation line that says only “LED lights included” is not enough. It should identify the included lighting components and controls, while clearly listing field wiring and site work that remain outside the pergola supply.
What to send with your pergola enquiry
Start with the project country, approximate pergola size, quantity, attached or freestanding layout, photos or drawings, intended lighting tasks and preferred controls. If an electrician has already selected fixtures or issued requirements, include the relevant datasheets and marked-up plan.
You can compare the current pergola layouts, review Oscar’s project and customization services, use the motorised louvre pergola quote checklist for the wider order brief, and send the project details to Oscar for quotation review.
Final review gate
- Every lighting zone has one defined purpose and control.
- The exact components and their outdoor suitability are documented.
- Cable routes, no-drill areas and service access are shown.
- The structure supplier and electrical installer agree on their responsibilities.
- A qualified local professional approves the electrical design before installation.
This review will not make every project identical. It creates a clear handoff so the pergola, lighting components and site installation are coordinated before fabrication rather than improvised afterward.