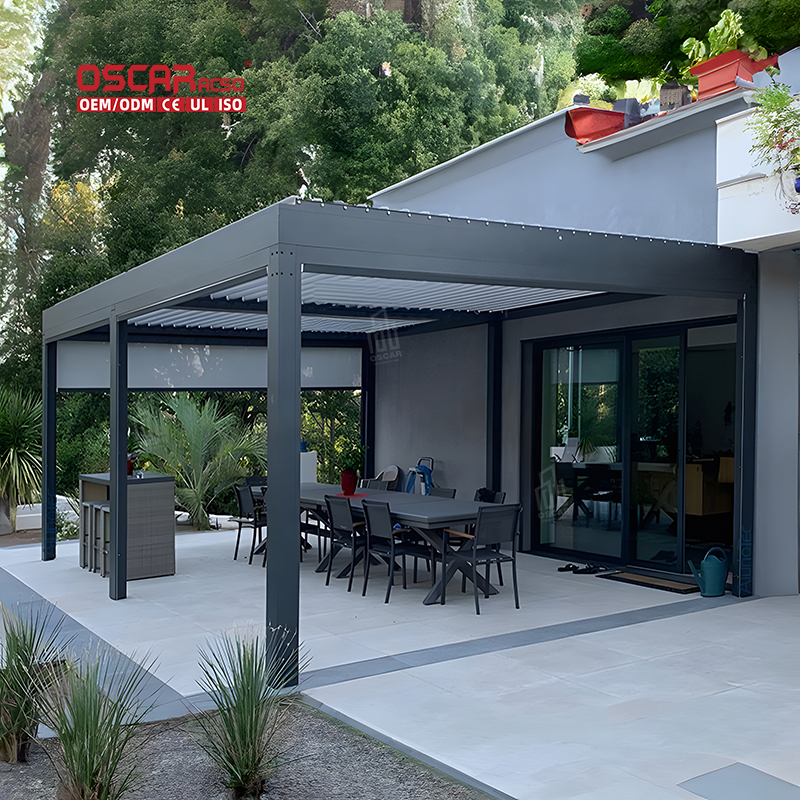
Wall Mounted Aluminium Pergolas, Elevate Your Outdoor Space with Style and Functionality
🌟 Why Choose a Wall Mounted Aluminium Pergola?A wall mounted aluminium pergola is a game-changer for any outdoor ar...
.jpg)
🌟 Why Choose a Wall Mounted Aluminium Pergola?
A wall mounted aluminium pergola is a game-changer for any outdoor area, seamlessly blending style and practicality 🏡. By attaching directly to your home’s exterior, it creates a smooth transition from indoor to outdoor living, effectively expanding your usable space without consuming precious ground area. This design is particularly brilliant for compact patios, balconies, or courtyards where every square foot counts.
.jpg)
The inherent properties of aluminium make it a superior choice. It’s naturally rust-resistant and incredibly durable, standing up to rain, sun, and wind without the constant upkeep that wood demands. Imagine enjoying your morning coffee or hosting a dinner party outdoors, sheltered from light rain or harsh sun, all under a structure that looks sleek and modern. It’s not just an addition; it’s a lifestyle upgrade that encourages you to spend more time outside.

⚙️ Standout Features and Brilliant Benefits
Wall mounted aluminium pergolas pack a punch with features designed for comfort and longevity.
- •
Adjustable Louvered Roofs: This is arguably the star of the show! Control sunlight and ventilation with precision using a manual crank handle or, in some advanced models, a remote control or even a smartphone app. You can angle the louvers to block rain, create shade, or open them fully to stargaze on a clear night.
- •
Integrated Drainage Systems: Ever worried about water dripping on you? High-quality models feature hidden gutter systems that discreetly channel rainwater down through the hollow legs and directly to the ground, keeping your seating area completely dry even during a downpour.
- •
Powder-Coated Finish: The aluminium isn’t just bare metal. It’s typically finished with a tough powder coat, like TIGER Drylac, which offers enhanced protection against UV rays, scratches, and fading. This means your pergola retains its sleek, modern look for years with minimal effort.

- •
Privacy Screen Compatibility: While wall-mounted models often limit screens to the front side (not the wall-attached sides), adding a screen can instantly create a more intimate and sheltered retreat, perfect for hot tubs or cozy lounging areas.
📐 Finding the Perfect Fit and Planning Your Project
The beauty of a wall-mounted pergola lies in its adaptability. A common question is: What’s a good standard size?Popular ready-made sizes often range around 3m x 3m or 3.6m x 3m, but many suppliers offer custom sizing to perfectly fit your unique space.
Before you get too far, checking local regulations is a crucial but often overlooked step. Most pergolas don’t require formal planning permission, but it’s always best to confirm this with your local planning office to avoid any hiccups later on.
Installation is typically a DIY-friendly project for those with moderate handy skills, often requiring 2-3 people and taking about 2-4 hours. They must be secured to a solid, flat surface like a concrete base or sturdy patio using the provided expansion bolts. For absolute peace of mind, especially with larger structures, opting for professional installation is a wise choice.
💡 Personal Insights: Maximizing Your Investment
From my perspective, a wall-mounted aluminium pergola is more than just a shade structure; it’s an investment in your home’s value and your quality of life. It creates a defined “outdoor room” that beckons you to relax and entertain, effectively extending the seasons in which you can enjoy your garden.
To truly maximize this investment, think of it as the centerpiece of your outdoor décor. Pair it with complementary furniture, outdoor rugs, strategic lighting (like integrated LED strips in the beams ), and perhaps some potted plants to soften the look. Choosing a model with a strong warranty—some offer up to 5 years or even more on the coating—provides long-term assurance that your oasis is built to last.
🔧 Installation Overview and Pro Tips
While a determined DIYer can tackle the installation, understanding the scope is key. The core steps involve securing a sturdy ledger board to your house wall (ensuring it’s bolted into wall studs for maximum strength), setting the support posts in concrete on the ground, and then attaching the main beam and louvered roof assembly.
The most critical tip? Never skip the flashing. Installing a metal flashing between the ledger board and your home’s siding is absolutely essential to prevent water from seeping in and causing rot or damage to your home’s structure. This one step protects your biggest investment—your house.

For a truly seamless and worry-free experience, especially with complex motorized systems or if you’re unsure about the structural aspects of your wall, hiring a professional is highly recommended. They can ensure everything is perfectly level, secure, and functioning as intended.

